Google BigQuery
Deprecated: The current method of Connecting is scheduled to be replaced by using-Upload Method
The following steps enable users to connect Single Origin to Google BigQuery. Please note your BigQuery Project ID since it will appear multiple times in the setup process.
Service Account
Single Origin Connector
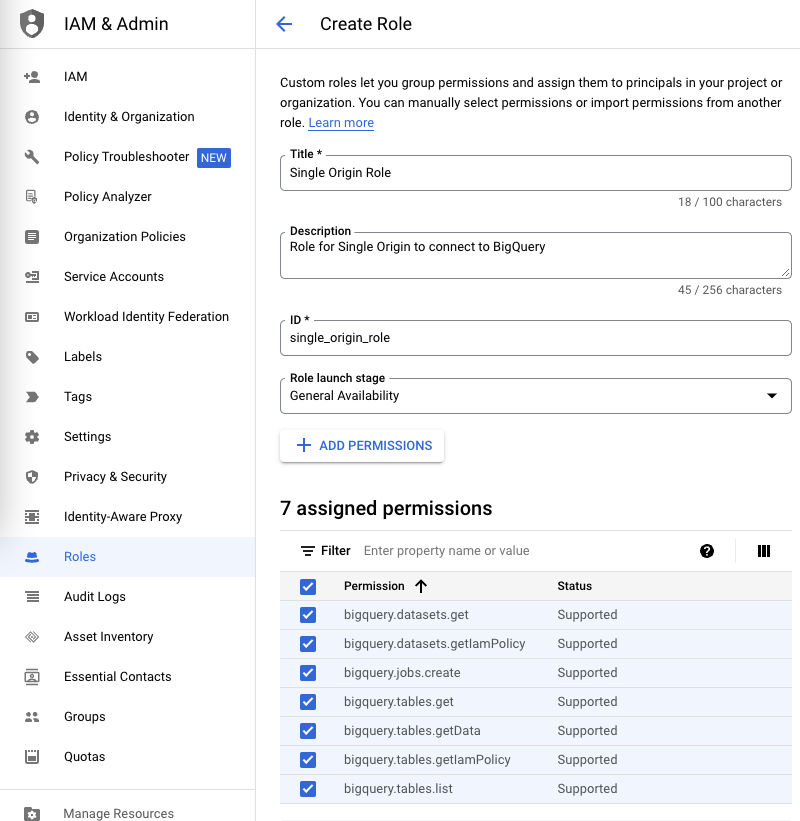
An admin will first need to set up a service account for the BigQuery project with the following 10 privileges:
- bigquery.datasets.get
- bigquery.datasets.getIamPolicy
- bigquery.tables.get
- bigquery.tables.getIamPolicy
- bigquery.tables.list
- bigquery.jobs.create
- bigquery.tables.getData
- bigquery.tables.create
- bigquery.datasets.create
- bigquery.tables.updateData
NoteAlternatively, you can use the predefined BigQuery Admin role, which includes all the permissions above.
If you want to create a Single Origin specific role, start with Step 1. Otherwise, continue to Step 2.
1. Create a role for Single Origin with the permissions above.
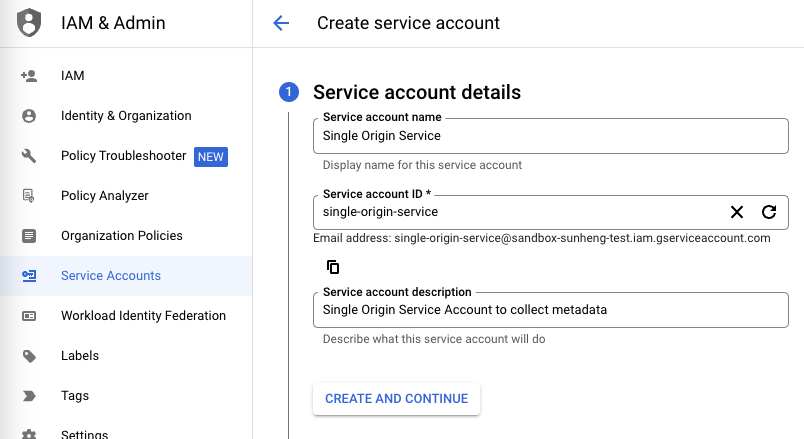
2. Create a new Service Account.
In the IAM & Admin section of the Google Cloud Console, choose Service Accounts. Then select Create Service Account and create a service account called "Single Origin Service."
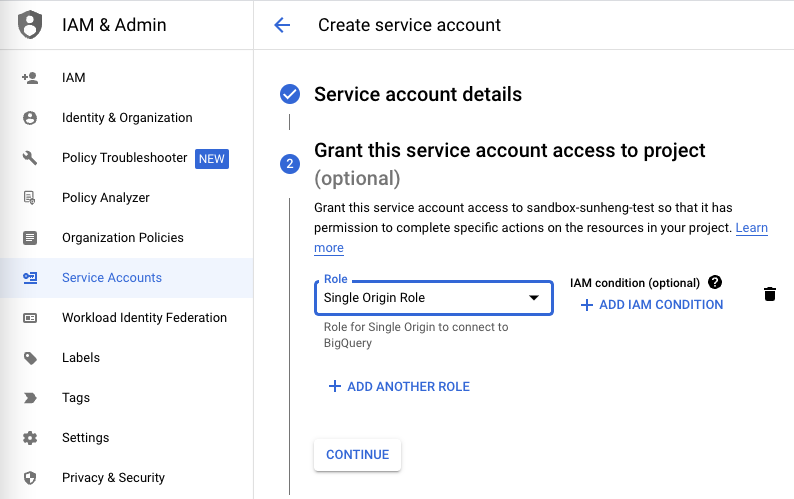
Click Create and Continue. Now select either the "Single Origin Role" created in Step 1 or the predefined BigQuery Admin role.
NoteIf the data is in a bucket, then you might have to go into "Cloud Storage > Bucket" and add permissions:
- Principals: “[service account name]”
- Role: “Storage Object View.”
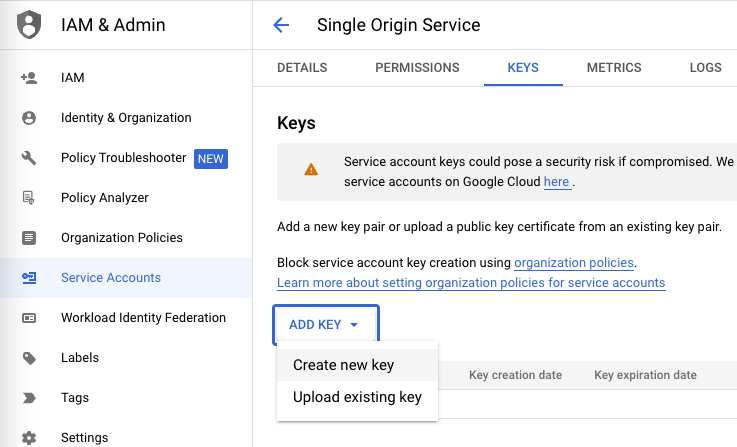
3. Create a new key in Google Cloud Console.
Once the service account has been created, go into the newly created service account. Go to the KEYS top tab > ADD KEY > Create new key. Select JSON and click CREATE. Finally, save the JSON in a safe place. We will need the content of this file later in the setup.
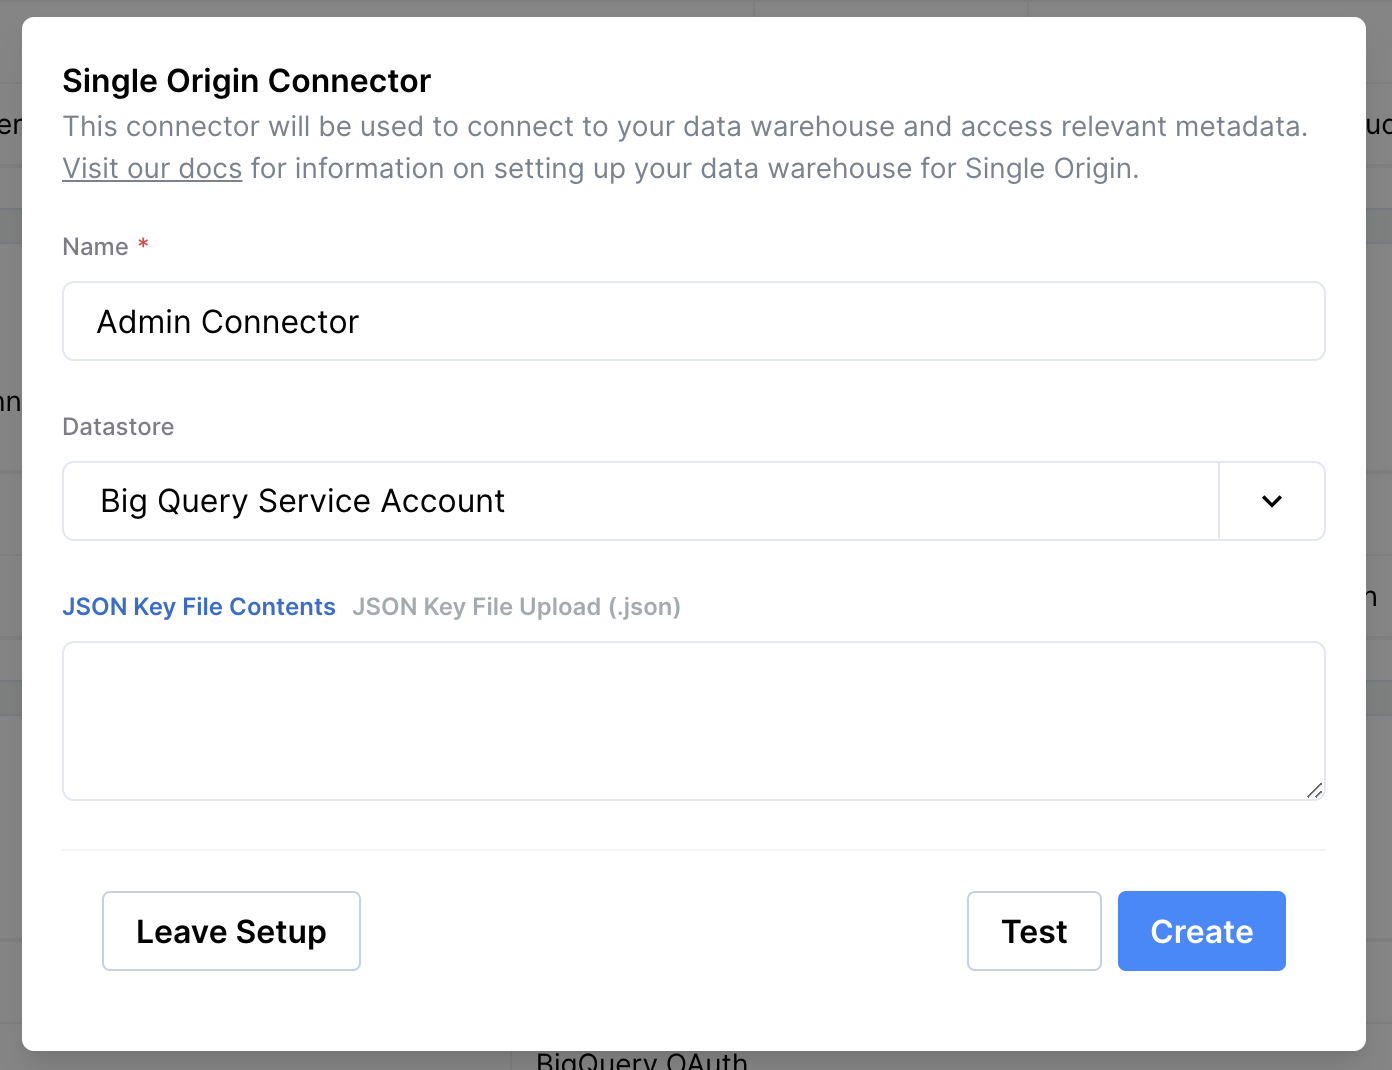
4. Create the Single Origin Connector.
Now return to Single Origin. Navigate to Mission Control > Connectors > Single Origin Connectors. Setup a new connector for the Datastore of Big Query Service Account. Fill out using the JSON file content from earlier. Then click SAVE.
Personal Connector
To get the most out of Single Origin, personal connectors should be able to query data. You can connect your personal connector using Service Account or OAuth.
Service Account
If you would like to use a service account as a personal connector, then we suggest setting up the service account (see Service Account section for set-up instructions) with the following privileges:
- bigquery.datasets.get
- bigquery.datasets.getIamPolicy
- bigquery.jobs.get
- bigquery.jobs.list
- bigquery.jobs.listAll
- bigquery.jobs.create
- bigquery.tables.get
- bigquery.tables.getData
- bigquery.tables.getIamPolicy
- bigquery.tables.list
- storage.buckets.list
- storage.buckets.get
- storage.buckets.getIamPolicy
- storage.objects.list
- storage.objects.get
- storage.objects.getIamPolicy
- resourcemanager.projects.get
- bigquery.tables.create
- bigquery.datasets.create
- bigquery.tables.updateData
NoteThe project for the personal connector must be the same project as the Single Origin connector.
Once a service account has been set up to use as a Personal Connector, setup is the same as for the Single Origin Connector. Retrieve the JSON key file from BigQuery and fill out the information in Single Origin Mission Control > Personal Connectors

NoteTo use OAuth instead of Service Account, the Admin must configure the OAuth integration.
OAuth Integration
NoteFor your Single Origin connector, we strongly recommend using a Service Account. If you use OAuth to setup a Single Origin connector, then you will have to reauthenticate your Single Origin connector every few days/weeks.
To connect to the data system through OAuth, Admins must configure the required OAuth information so that other users can connect through OAuth.
Google Cloud HelpFor more on OAuth, see Setting up OAuth 2.0 - Google Cloud Platform Console Help.
1. If you have not done so before, then first configure the consent screen & add scopes.
Choose Internal

Fill out the required fields
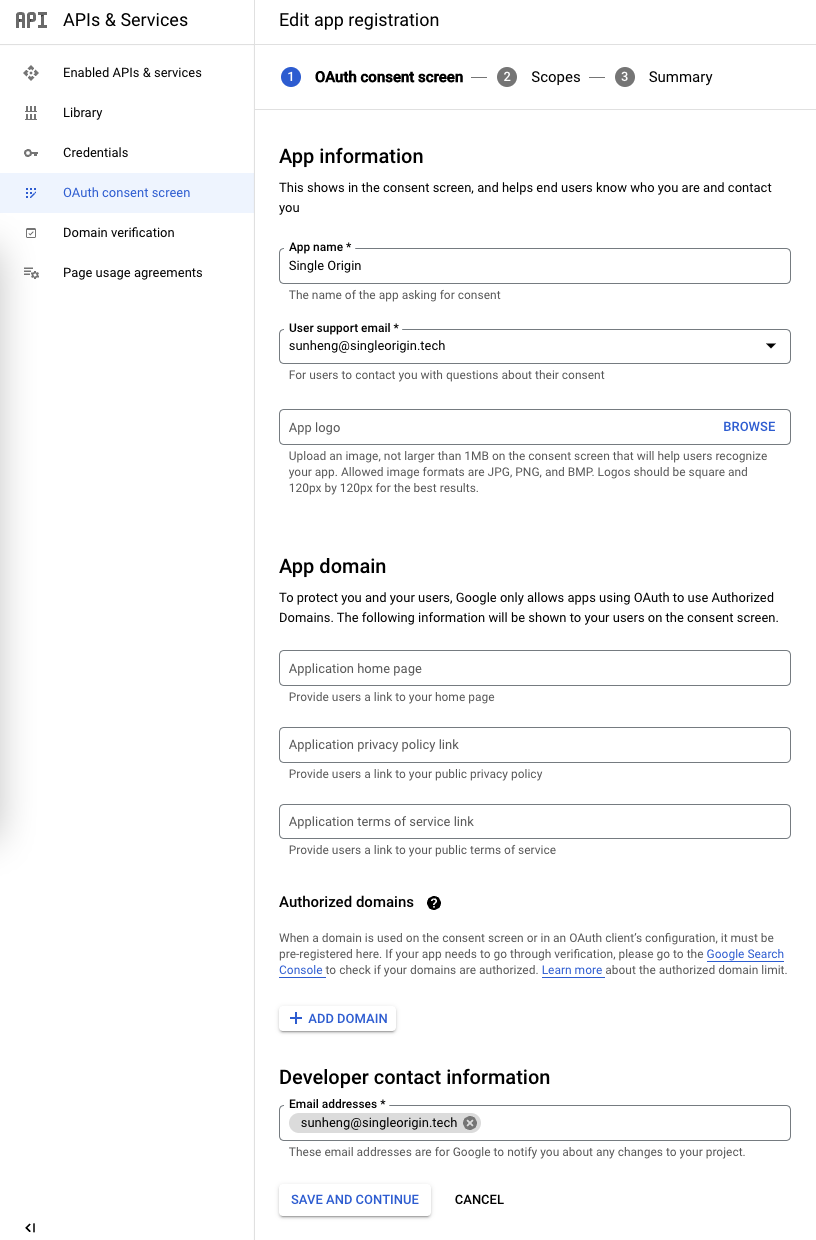
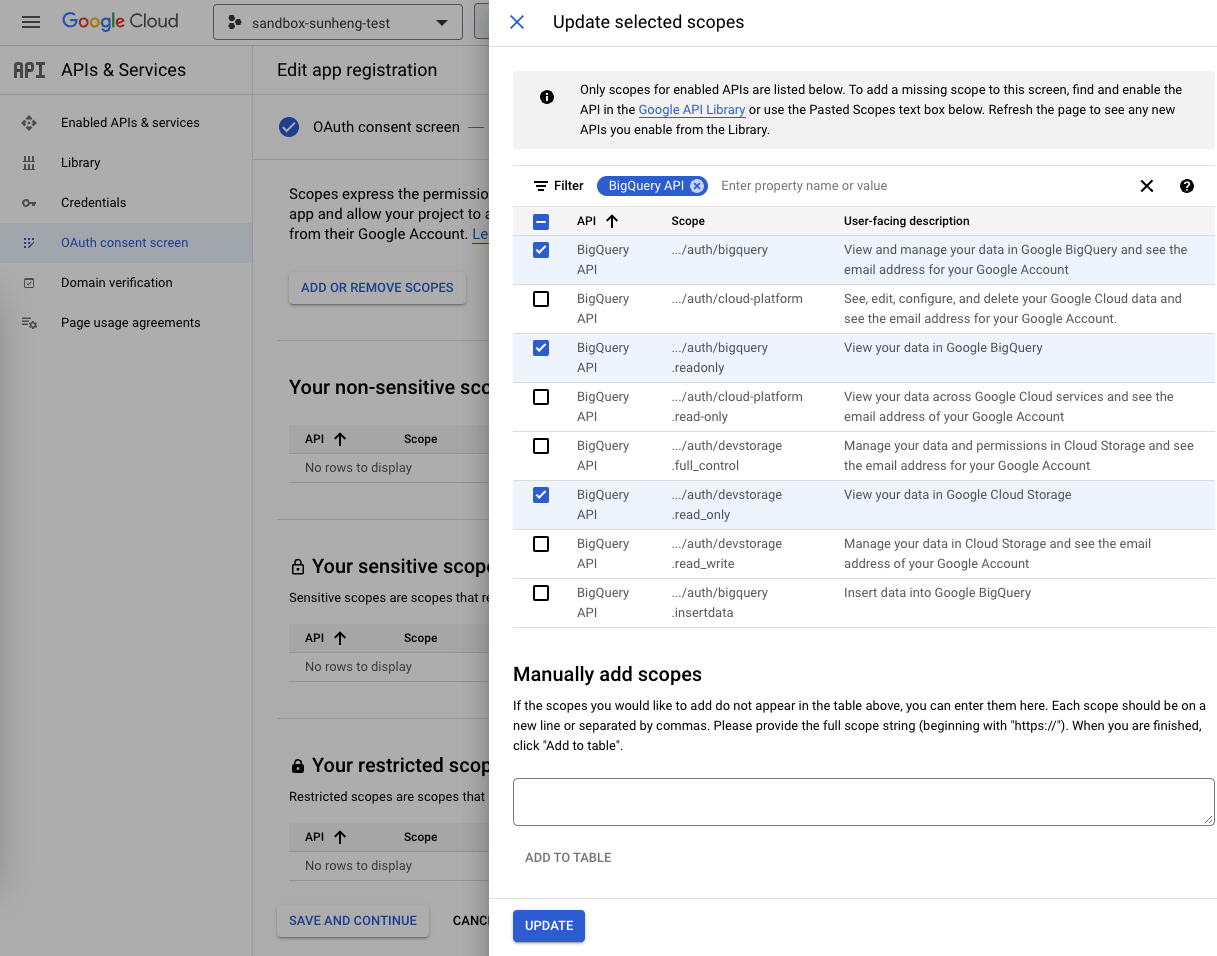
Click ADD OR REMOVE SCOPES, filter by BigQuery API, select the scopes to access data; see screenshot below.
2. Create new OAuth Credentials (Client ID) for Single Origin in your Google Cloud Console.

3. Fill out the following information.
- Application Type: Web Application
- Name: Single Origin OAuth Client
- One Authorized Javascript Origins:
<https://{tenant}.singleorigin.tech>- Replace
{tenant}with what is in your instance URL.
- Replace
- One Authorized Redirect URIs:
<https://{tenant}.singleorigin.tech/api/connectors/oauth/bigquery>- Replace
{tenant}with what is in your instance URL.
- Replace
- Save the Client ID and Client Secret for later
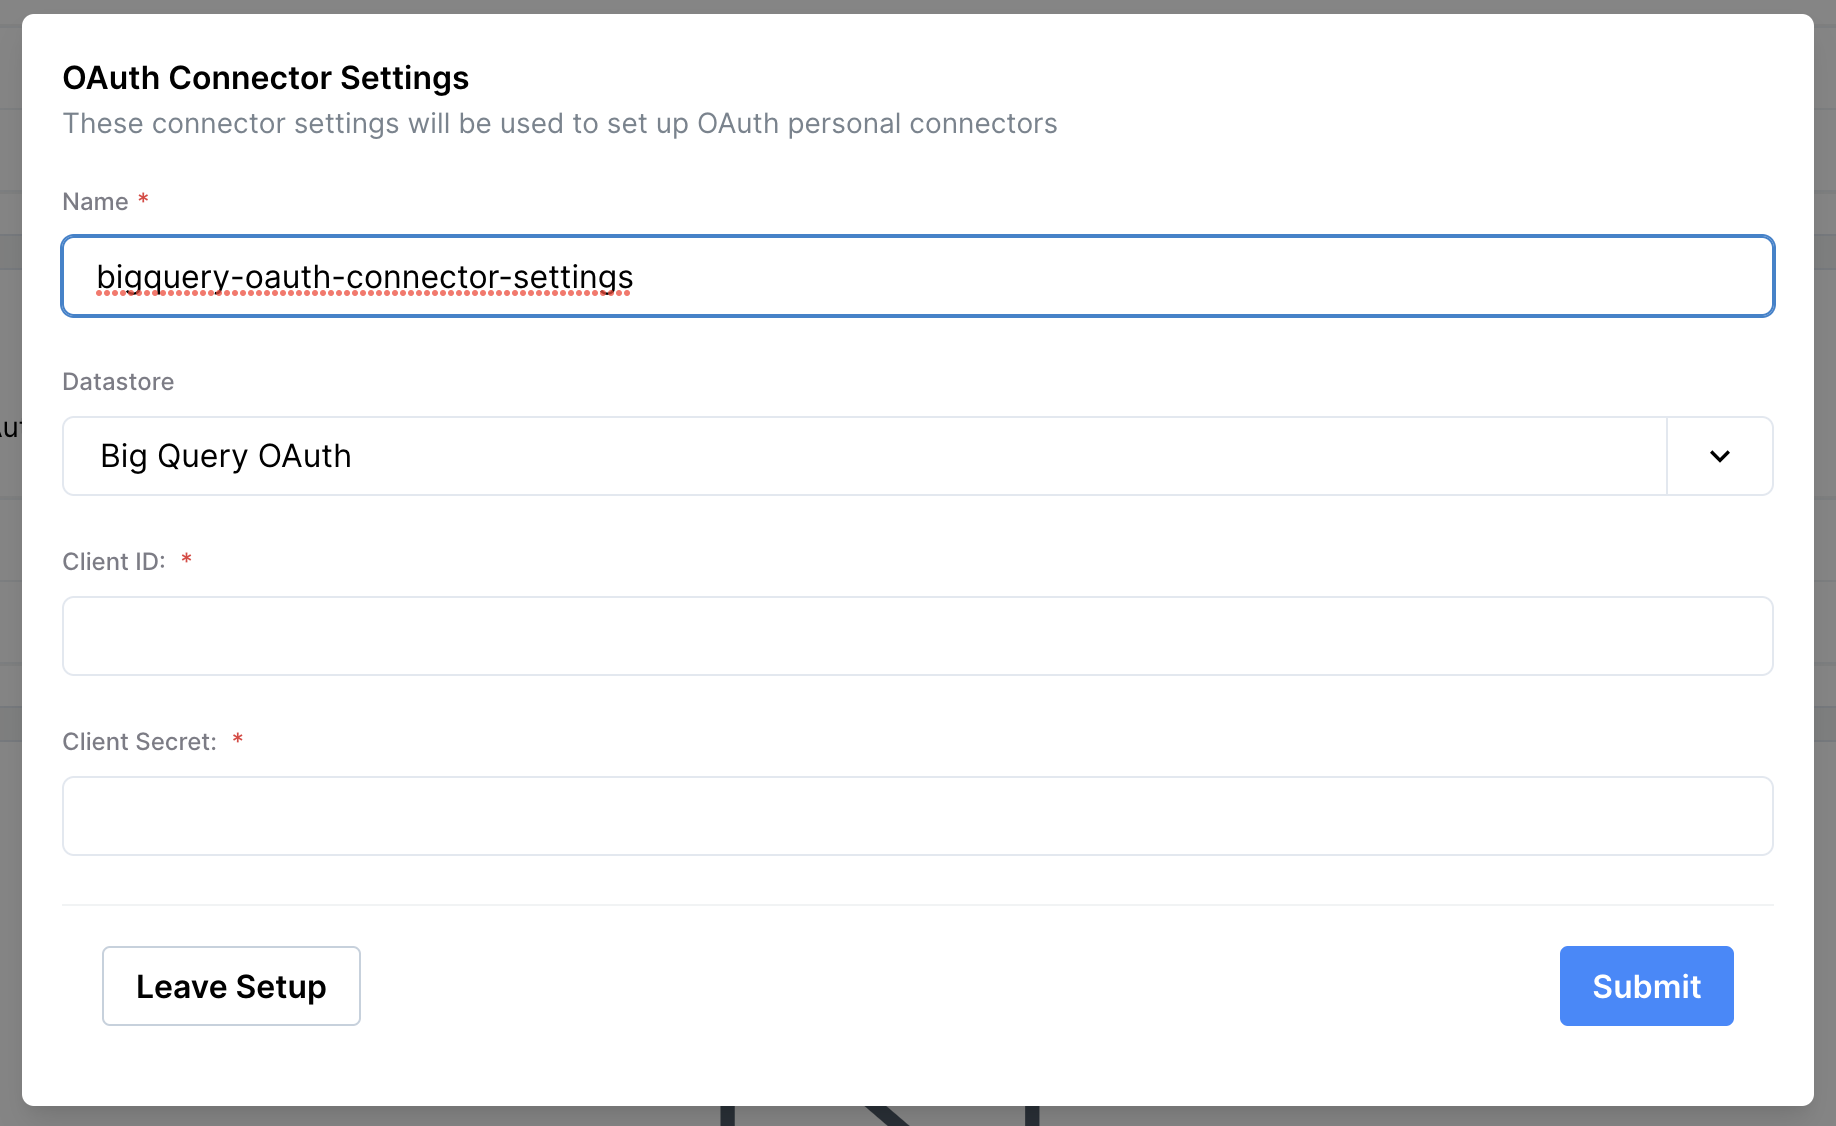
4. Now that you are set up in Google Cloud Console, return to Single Origin (<https://{tenant}.singleorigin.tech/mission-control/>).
<https://{tenant}.singleorigin.tech/mission-control/>).Navigate to Mission Control > Single Origin Connectors > Create Connector Settings Copy and paste the following from Google Cloud into Single Origin:
Client IDClient Secret
Once this is complete, Admins have configured the required OAuth information for any connector to use OAuth in addition to Service Account.
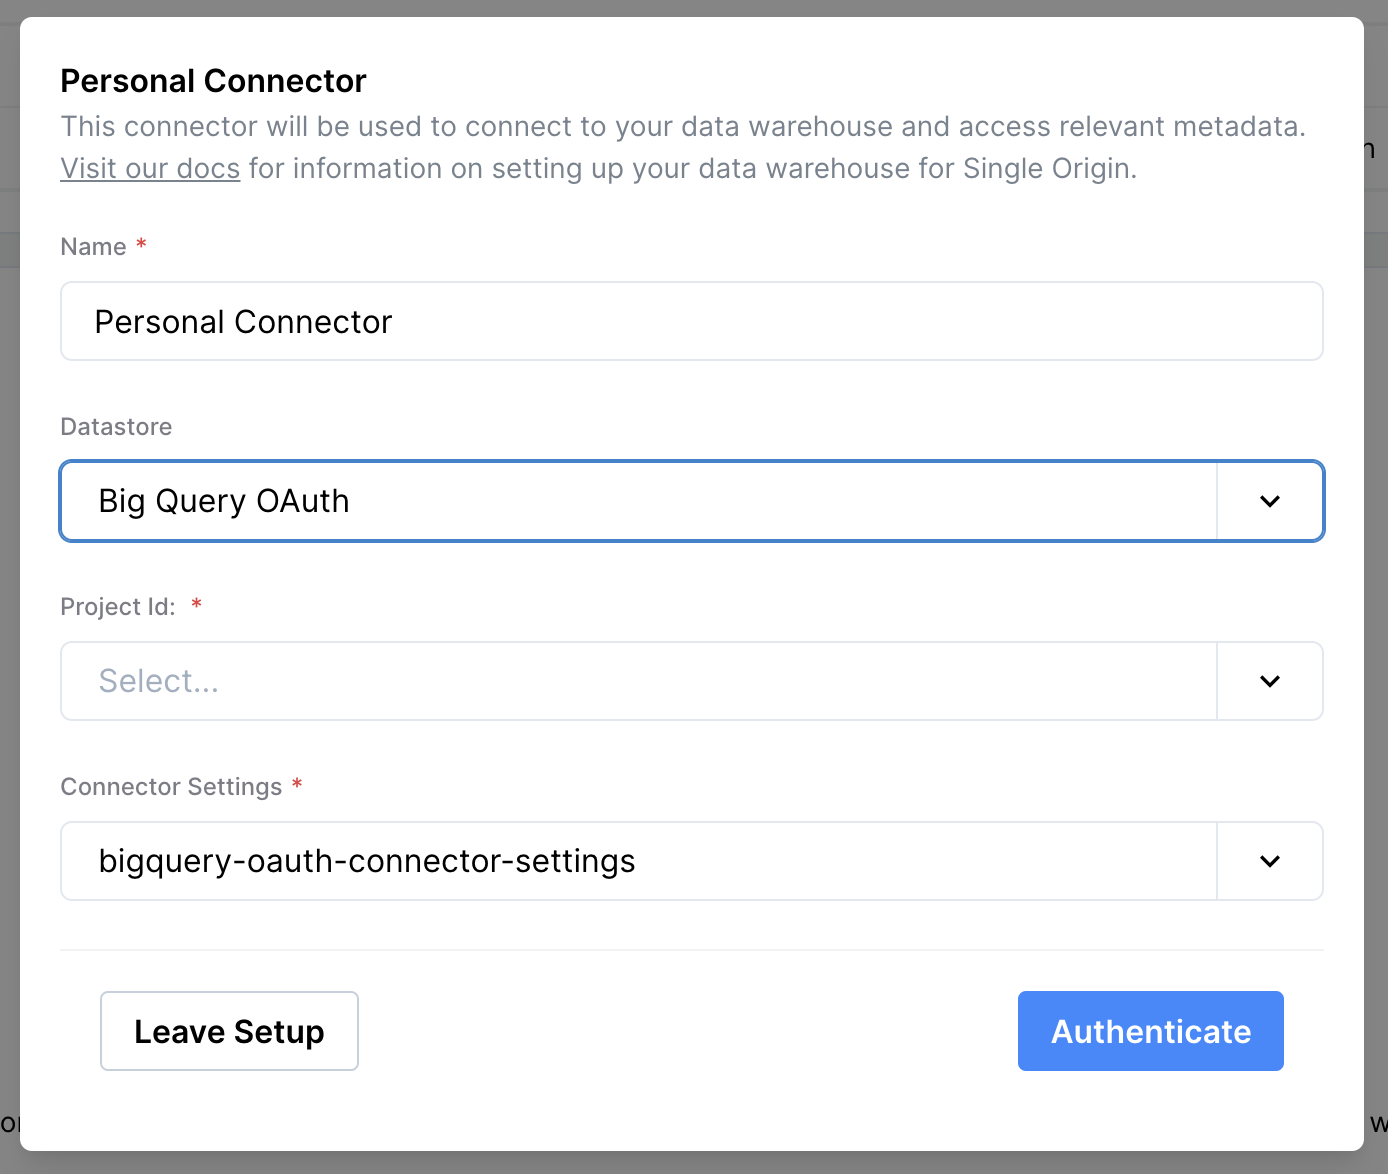
- Navigate to
Mission Control>Single Origin>Personal Connectors - Confirm the Name and the Project ID. Note that we use the Project ID associated with the Single Origin Connector.
- Click
Authenticate with Google BigQuery
Issues
- If you run into
Error 400: redirect_uri_mismatchduring OAuth integration- This may be caused by a misconfiguration of the URLs, please ensure the URL is pointing to the instance you're using by replacing the
tenantwith your own dedicated tenant.- One Authorized Javascript Origins:
<https://{tenant}.singleorigin.tech> - One Authorized Redirect URIs:
<https://{tenant}.singleorigin.tech/api/connectors/oauth/bigquery>
- One Authorized Javascript Origins:
- This may be caused by a misconfiguration of the URLs, please ensure the URL is pointing to the instance you're using by replacing the
- Please reach out to
[email protected]for any issues and we'll get right back to you.
Updated 11 months ago